Do Solar Panels Work in the Winter?

Solar energy captures the sun’s rays and converts it into clean electricity for your home or business. Solar panels are comprised of semiconductor devices known as solar cells. These are surrounded by a back sheet made of extra-durable plastic and metals, as well as a thin sheet of glass. Metal connectors are then soldered to the solar cells. For professional help, contact Solar Companies Utah.

Solar Panels

Grid-tied systems connect directly to the power grid through a two-way meter, providing financial payback while delivering sustainable energy to the utility company. They work without the need for a battery backup and are currently the most common solar system type worldwide. They use an inverter to convert Direct Current (DC) into Alternating Current (AC), which is then fed into the electrical grid. When your home uses more energy than it produces, the power goes back to the grid, and the utility credits you for the excess. This is the most efficient type of solar system, and it can save you money on electricity costs in the long run.

The best part about a grid-tied solar system is that it doesn’t require batteries or a generator. During the day, your solar panels produce more energy than you need, and the power grid will supply your home with enough electricity for all of your needs at night. This eliminates the need for expensive batteries and makes grid-tied solar systems a great choice for homeowners. In addition, most homeowners can qualify for net metering programs, which allow you to offset electricity charges with solar energy produced by your home.

This type of system maximizes solar energy utilization, and it reduces reliance on fossil fuels, which is good for the environment. Plus, solar power doesn’t require water to operate, which is a huge benefit in regions where water is scarce.

A grid-tied system is also easy to install and maintain. It’s simpler and more cost-effective than off-grid solar systems, which can require a substantial initial investment. Additionally, the equipment required for a grid-tied system is cheaper and more familiar to electricians, making installation a much simpler process.

If you decide to go with a grid-tied solar system, it’s important to keep in mind that it will shut down if the power goes out. This is because Underwriters Laboratories requires that solar systems are shutdown during power outages to protect the safety of utility workers. If you want to ensure that your solar system will stay active during a power outage, you can add battery backup to your system or opt for an off-grid system.

They’re more efficient in cold weather

Many people are wondering whether or not solar panels work in the winter. After all, the sun is less frequent in the winter and the days are shorter. This means that the energy produced by a solar panel will be lower than on a warm summer day. However, this is not because the solar panel is working less efficiently, but because there are fewer hours of peak sunlight.

It may surprise you to learn that solar panels actually perform better in the cold. The reason is that they are at their most efficient at lower temperatures. This is because solar panels convert sunlight into electricity using photovoltaic cells, which are activated by light rather than heat. When the cells are at their lowest temperature, they can produce more voltage and thus more electricity. As the temperature rises, the cells lose their efficiency.

In addition, the surfaces of solar panels are designed to be reflective, which helps them capture more of the sun’s light in the winter. This can lead to even higher levels of power production on sunny days.

However, if too much snow is on the surface of the solar panels, it can interfere with their performance. That’s why it’s important to regularly clear the snow off of your solar panels with a broom or a scraper. Be careful not to use a power washer, as this can damage the surface of the panels.

If you’re worried that going solar isn’t a good fit for your home, don’t be. Solar is a great way to make your home more environmentally friendly and save money on your utility bills. It’s also a great option for those living in states with colder climates, like New England. If you have questions about the best solar solution for your home, contact a professional. They can help you find the right system and get started saving on your energy costs today!

They’re durable

Solar panels are made from a variety of materials, including silicon and aluminum. They’re built to withstand high winds, rain, and ice. Most manufacturers put their panels through rigorous testing to ensure they can stand up to the harshest weather conditions. SolarWorld, for example, tests its panels with pouring rain, hail, sleet, snow, baseballs, and heavy weights. The results are impressive!

Most solar panels are highly durable, and many will last for 25-30 years. Even after this point, they can continue to generate electricity, but at a lower efficiency. However, excessive exposure to sunlight can degrade their performance, so it’s important to find a shaded location for your solar system.

Unlike fossil fuels, solar energy produces clean power with no harmful emissions or waste products. This makes it an environmentally friendly source of energy that can help to reduce the carbon footprint of businesses. Additionally, solar panels are a great way to save on energy costs and make your business more profitable.

A solar panel consists of silicon solar cells, a metal frame, and wiring elements. They’re then encased in a glass sheet and an insulative layer to protect them from excess heat. Most solar panels use monocrystalline silicon cells, which consist of one solid silicone crystal. They’re more efficient than polycrystalline silicon, but they also cost more.

There’s no shortage of the materials used to build solar panels, as both silicon and aluminum are abundant on Earth. The glass that covers the cells is tempered, which makes it very durable and able to withstand hail impacts. The glass is also incredibly clear to maximize sunlight absorption.

The aluminum frames and junction boxes of a solar panel are also very durable, making them an excellent choice for residential and commercial buildings. Moreover, they’re easy to install on roofs and other structures.

Another benefit of solar panels is that they’re reusable and recyclable, reducing the need for mining fresh raw materials. They can also help to decrease reliance on traditional fuels, which are known to cause environmental damage. In addition, they can be used for energy storage.

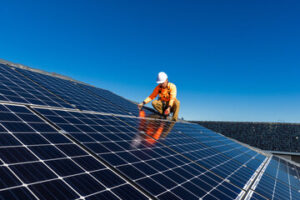
They’re easy to install

Solar panels are an easy way to save money on electricity. They require very little maintenance and are an excellent way to reduce your carbon footprint. However, it’s important to know how to install them correctly. If you’re thinking about going solar, consult a local installer to make sure the process is done right and you don’t miss out on any rebates or tax credits. The installer can also help you decide if your region is well-suited for solar energy. Some regions have strict regulations for solar panel installation, and you may need to get a permit.

The main components of a solar system are silicon solar cells, a metal frame and wiring elements. A glass cover protects the panel from excessive heat and humidity. An insulative layer and a back sheet prevent corrosion. The cells are placed in a metal frame with latches that fasten to mounting clamps on the roof. The clamps are usually screwed to rafters in the roof’s structure. In addition, a specialized type of mount can tilt the panels for optimal sunlight exposure.

To produce power, the p-type or n-type silicon solar cell mixes crystalline silicon with gallium or boron and adds phosphorus to make it electrically conductive. Then the silicon ingot is cut into thin sheets. Narrow slits are then cut into each individual cell to funnel sunlight to the conductive silicon. The slits are coated with an anti-reflective material to increase the solar panel’s efficiency. A backsheet made of extra-durable plastic or metal is then installed to keep the cells from overheating. Metal connectors (also called bus wires) connect the silicon solar cells in parallel.

Once completed, a solar panel is tested under Standard Test Conditions to ensure that it meets its projected outputs and efficiencies. If the panel passes this test, it’s ready to be shipped and installed on a rooftop.

There are two types of solar PV mounting systems: pole and roof-ground mounts. The latter are more common and provide more flexibility. They can be positioned to face the sun in winter or summer and can be adjusted to match the solar radiation pattern of your location. They are also able to withstand high wind speeds.

How to Properly Install a Window Replacement

The level of skill required to install a replacement window depends on whether you’re installing a full-frame or insert window. Follow the product installation instructions to determine which type of project you’re taking on.

Window Replacement

Before you begin, spray the inside of exterior casings or blind stops with a waterproof caulk. Stuff gaps wider than 1/4 inch with foam-rubber backer rod and caulk the edges.

Window frames play a vital role in securing your windows and creating a sturdy, energy-efficient, and attractive window. If your frame is cracked, rotting, or otherwise damaged, it will need to be repaired or replaced. These repairs could involve filling cracks, repairing broken sashes or sills, or replacing the entire frame unit. A repair company will provide you with the necessary options based on your specific needs and climate.

There are a variety of different frames available on the market today, each suited for certain climates and home styles. Aluminum, for example, is a popular option. It is affordable, easy to maintain, and provides good insulation. However, it is not as durable as wood or fiberglass, and can become dented.

Fiberglass frames are another popular choice. They are also affordable, durable, and energy efficient. They also resist heat and come in a variety of colors to match your existing decor. However, these frames are not as common as other options and may not be readily available in your area.

Another type of frame that is becoming more popular is a composite one. These frames consist of a wood core that is wrapped in vinyl, fiberglass, or aluminum. This combination provides the durability and appearance of wood, while eliminating the higher maintenance requirements it is known for.

It is important to keep in mind that a window frame replacement requires precise measurements and installation to ensure proper performance and a snug fit. To avoid costly mistakes, you should use a tape measure and carpenter’s square to accurately mark the dimensions of your window opening on the wall before starting the project.

If you have any questions about a window or window frame repair, contact a professional service for a free consultation. You can also visit an expert in-home showroom to find the perfect replacement windows for your home. You can find dealers by zip code using the dealer locator tool on this website.

Glass

If your windows are old, damaged, or in need of a major upgrade, it’s often worth replacing them rather than repairing them. Newer window technology uses insulated glass units with multiple panes and special coatings that significantly improve energy efficiency. These benefits reduce energy bills, contribute to a more sustainable environment, and make new windows a wise investment for any home.

If you have older windows that are in good shape, however, it may be best to repair them instead of replacing them. Newer window frames are typically built with a stronger material than the wood used in historic homes, making them less likely to warp or rot. And, if your windows are rattling or drafty, it’s likely because the frame has structural damage and needs to be replaced.

When deciding whether to repair or replace your windows, it’s also important to consider their style and quality. If your windows are old and outdated, you might want to consider upgrading them with modern styles that fit in better with the rest of your house and add a more polished look. You can also choose higher-quality glass with low-emissivity coatings and argon gas fills, which are more energy efficient than traditional single-pane glass.

Another important factor to consider is the condition of your window casing. If it’s cracked or chipped, it’ll detract from the beauty of your home and leave your home vulnerable to damage and water leaks. A handyman can easily fix this by applying a layer of caulk or epoxy to the affected area.

If you live in a high-rise building, it’s important to note that maintaining the windows on a skyscraper requires specialized skills and equipment. Luckily, Bayview Glass is well-equipped to address this challenge, whether it’s repairing damaged glass on the upper floors of a building or adding security film to prevent break-ins.

When it comes to repairing or replacing your windows, there are two main types: pocket replacement and new-construction replacement. Pocket replacements are a great option for existing framed windows, but you’ll need to remove the sashes and frames to install the new ones. New-construction replacements are appropriate for new construction and require the removal of the entire window sill and jambs to replace them with the new ones.

Hardware

If you live in an area prone to storms, the seasonal expansion and contraction of your home’s shell can enable ice, wind, and moisture to enter, robbing your energy and leading to rot around your windows. To counter these effects, you may want to install storm windows. These are a type of window that features an outer frame with a pane and inner sash. When the windows are closed, they create a seal to protect your home from weather and insulate it from outside temperatures.

Window replacement professionals can help you select the right storm windows to complement your home’s style and fit with the existing window frames. They can also assist you in ensuring that your home’s insulation is properly installed and up to standards.

Choosing the right replacement windows can improve your home’s value and increase its resale appeal. There are many considerations, however, that affect the final cost. These include the window type, installation method, and other factors.

Replacement windows are a pop-and-drop installation process, meaning the old window is popped out and the new one dropped into its place. This is a quick and affordable option, but it can leave your home with less glass and light than if you used a window designed for new construction.

When installing replacement windows, your professional may recommend using newer double- or triple-pane windows to improve your home’s energy efficiency. These windows are designed to provide better insulation than single-pane windows and can save you money over time by lowering your heating and cooling costs.

If you’re replacing windows in a historic home, consider your options carefully. Some styles and materials aren’t available for older homes, which can limit your choices and drive up the price of your project.

When selecting a replacement window, you should also look for Energy Star ratings and other certifications that indicate the quality of the window. These are important because they can help you qualify for a 30 percent federal tax credit on your expenditures, up to $600 a year through 2032. The tax credit can be claimed on any individual windows that meet certain criteria, as well as any energy-saving improvements made during the course of your renovation project.

Seals

When window seals begin to fail, air leakage becomes an issue. Cold and hot outside air can sneak into your home causing energy bills to increase. In addition, moisture and humidity can seep into the space between glass panes resulting in foggy windows. This is a clear sign that window seals need repair or replacement.

The best way to determine if you need window seal repair or replacement is to schedule a comprehensive inspection with a qualified exterior contractor. A professional will inspect the frames, glass, and the window seals and recommend a course of action. They will also determine if you have other issues affecting your windows that need to be addressed such as damaged frames or warped glass.

If your windows are double or triple-pane and have insulating gases between the glass, there are several options for replacing the IGU. You can replace the IGU with a new one or install an energy efficient replacement window with double or triple glazing. This will help to lower your energy bills and improve the comfort in your home.

Another option for window seal replacement is to re-seal the existing frame and glass with new sealant. However, this is not recommended for the average do-it-yourselfer as it is a highly technical job that requires knowledge of precision work and proper techniques. Inexperienced DIYers can damage the frames and glass when attempting to re-seal their own windows.

Defogging your windows can be a more cost-effective and less intrusive alternative to replacing the entire IGU or window. A professional defogging technician will drill a hole in the glass and vacuum out the condensation between panes of your windows. They will then apply an anti-fogging agent to the interior surface of the glass and seal the holes to prevent future moisture build up between panes.

The best way to avoid window seal failure is to protect them from direct sunlight, extreme temperatures, and physical impacts. Regular cleaning and maintenance will also lengthen the life of your window seals. Excessive impact on your windows such as from kids, pets, and harsh window cleaning tools can cause wear and tear that deteriorates window seals before their time.

Mold Testing and Its Limitations

Mold Testing NYC is a valuable tool for identifying and remediating mold growth in your home. However, it’s important to understand its limitations.

It’s also important to understand how the labs interpret their tests. This will help you avoid wasting money on unreliable test results. Visible mold growth, musty odors, and water damage indicate a potential problem.

Mold inspections can be expensive but important for homeowners and real estate buyers. A professional will perform a visual inspection and take multiple surface samples. This process is more thorough than a DIY test kit and will help you identify areas that require remediation. In addition, a professional can interpret lab results and help you find an effective remediation plan.

The price of a mold inspection depends on the type of testing, home size, inspector and testing method. The most basic mold tests cost around $450. This price includes labor and testing supplies. However, a larger space will cost more to test because the inspector needs to take more samples from different locations.

Staining or culture tests cost an additional $150 on top of the cost of swab and tape testing. These tests are used to determine the specific types of spores in a sample and can provide valuable information about how the mold spreads. They’re especially useful when a professional is trying to determine which type of remediation is most appropriate for the area.

Some molds, such as Cladosporium and Trichoderma, are fairly easy to spot with a visual inspection and don’t require additional testing. Others, such as Chaetomium and Stachybotrys chartarum, are difficult to identify and can cause health problems. A professional can use staining and spore count tests to identify these molds and recommend the most effective remediation method.

A mold inspection should be done before a buyer makes an offer on a home. It should also be done after a hard rain or whenever moisture accumulates in the home. A mold inspection can help you avoid costly repairs and prevent the spread of mold.

The ERMI, or Environmental Relative Moldiness Index, and other DNA tests can identify the species of mold and indicate how much of it is in the air. These tests are more expensive than swab and tape tests, but they’re also more accurate. It’s important to remember that a test result only provides a snapshot of the amount of mold at one point in time and location.

Time

The time it takes to perform a mold test varies, depending on the type of test. Some methods involve collecting air samples to measure the number of mold spores in a room. These tests can take 3 to 4 days from sample collection to receiving the results. However, there are other testing methods that are more accurate and can be performed much faster.

Mold spores can be found in the air, in settled dust, or on surfaces of building materials and furnishings. Several methods can detect mold spores in the air, including non-viable air sampling and bulk spore analysis. However, these methods may not always accurately identify all types of mold spores. The types that are detected may be those that can grow on the food source used to incubate the samples, which may not represent all forms of mold growth.

In addition, a test that simply measures the number of spores in a room cannot tell whether these spores are actually causing health problems. The numbers can vary dramatically from one time to the next, since a variety of factors can affect the number of spores in the air. These factors include wind, weather changes, and occupants moving from room to room.

It is possible to do a more precise mold analysis using a viable image or culture sample. Viable images entail collecting a small piece of mold growth and sending it to the laboratory. The lab will analyze the growth and determine the type of mold present. However, this process is more expensive and can take several days to receive results.

The most accurate and reliable way to test for mold is to hire a qualified professional inspector. They will be able to recommend the best method for testing and can provide a detailed report with recommendations for remediation. They can also help homeowners interpret the results of a mold test.

Performing a mold inspection is especially important when buying a home. Most real estate transactions have an inspection period where the buyer can check out the property for signs of a problem. It is also a good idea to have a mold inspection after a flood or any time there are signs of moisture buildup, such as water spots on walls and ceilings.

Accuracy

When it comes to detecting mold growth and its potential health hazards, a professional mold inspector can help. They can provide a detailed report identifying the types and extent of the mold growth in your home as well as recommendations for remediation and prevention.

However, it is important to understand the limitations of any mold testing method. The most common tests find mold spores suspended in the air or in settled dust. These tests cannot tell whether the spores are alive or dead, and they may not be able to identify the specific species of mold present in the sample. A spore count or colony forming unit reading from an air sample can also be misleading, as these numbers do not relate to exposure levels that lead to symptoms in occupants.

There are some tests that can identify a portion of the live (viable) molds in a sample by growing them in a lab. These methods are more accurate than a spore count or colony forming units, but they still miss a large number of molds and may not be able to identify the specific types of molds present in the sampled environment. The types of molds identified in a sample may also be affected by the nutrients used to incubate them, and nonliving molds that didn’t grow in the lab can also be missed.

Surface sampling, such as swabbing or taping a material, can be used to identify the type and extent of mold growth, but it is invasive and may damage the material. Bulk samples can be collected from materials such as drywall or insulation to identify the mold type and extent, but this can be costly and time-consuming. Air testing is often the most practical option for assessing indoor air quality.

It is critical for homeowners to understand the limitations of any mold testing method before choosing a company to perform it. Skilled investigators are aware of the limitations and will not recommend testing when it is impractical. They should also be willing to explain why a test is recommended or not and how it can be interpreted.

Misinterpretation

When it comes to the topic of mold, there is a lot of misinformation. As a result, many people request mold testing when it is not necessary. The most common reason for this is because they are concerned about potential health effects from visible mold. However, it is important to understand that there are no federal standards for mold or mycotoxins and the results of air sampling tests only provide a snapshot estimate of what may be in the air at one time and location. As a result, it is easy for someone to interpret the results incorrectly.

The most common method for collecting an air sample involves using a plastic cassette that has a slit and a sticky surface inside of it. When you place the cassette on a test surface, it draws in mold spores and deposits them onto the surface. Once the sample is taken, it is shipped to a lab for analysis. The lab can then identify the number of spores and the genus, but not the species. The results of these non-viable tests can be highly misleading.

Another way that a person can misinterpret the results of an air sample is to compare them to other locations and times. This is because spore counts are only a snapshot of what is in the air at that moment and may change drastically over short periods of time.

This is especially true if the home or business has recently experienced changes in weather conditions. For example, if it rains on the day of an air sample, it could dramatically alter the outside control. This could result in a falsely low comparison of indoor to outdoor spore levels. It is also important to remember that mold spores are only a fraction of the total number of spores in an environment. Visible mold growth and other indicators, such as a wet drywall or elevated moisture, should always be evaluated before any testing is done. This will help you avoid wasting money on an unnecessary mold test. If you suspect that you have a mold problem, it is best to hire a professional inspector who can conduct a thorough inspection and recommend appropriate action.

Garage Door Repair – Things You Can Check on Your Own to Prevent Costly Repairs

Garage Door Repair Mustang OK requires a professional to ensure your safety and the proper operation of the system. However, there are many things you can check on your own to prevent costly repairs and improve the look of your home.

Garage Door

A crooked or sagging garage door often indicates broken springs. Replacing these in pairs saves money and reduces stress on the opener motor.

As they cycle through hundreds of opening and closing cycles, your garage door springs can lose their elasticity and begin to wear out. This is an inevitable part of the process, and it will eventually happen to all springs. When this occurs, the springs will no longer be able to support the weight of your garage door, and you’ll notice that it becomes difficult to open and close your garage door.

Whether you have extension or torsion springs, it’s important to call in a garage repair specialist right away when one of them breaks. Broken springs are under high tension, and they can cause serious injury if you try to handle them on your own. However, there are some temporary measures you can take if you’re willing to take the risk.

A garage door with a broken spring will often become crooked. This is because the weight of the doors is no longer evenly distributed, which can lead to loose cables and other problems down the line. If you don’t have safety cables installed, it’s a good idea to get them installed right away. These cables are designed to prevent the spring from snapping if it loses elasticity and hits something in its path.

When a torsion spring breaks, you may hear a loud bang. This is because the tightly wound coils of the spring have a lot of bound energy that can create a great deal of noise when they break. To prevent this from happening, it’s a good idea to lubricate your springs occasionally with silicone-based lubricant.

To replace a torsion spring, homeowners will first need to remove the old spring by disconnecting it from the torsion tube. Then, they’ll need to purchase a new pair of springs that are the same size as the originals. To install the new springs, homeowners will need to alternately lower and insert the winding bar into different holes on the winding cone until all of the tension is released.

Once the springs are replaced, the homeowner will need to thread a new safety cable through each end of the moveable pulley. Then, they will need to attach the ends of the cable to the track brackets. Finally, they will need to secure the new springs and make sure that they are properly centered on the torsion tube.

Damaged Panels

The panels that make up the face of your garage door are susceptible to all kinds of damage. Accidental collisions with vehicles and sports balls are among the most common causes of panel damage. But the weather is also a factor, with fluctuating temperatures and prolonged exposure to UV rays gradually leading to warping and discoloration. Finally, normal wear and tear can cause cracks and dents that may eventually lead to a loss of structural integrity.

For minor damage, a professional can often repair the affected panel with a bit of filler and some paint. However, if the damage is extensive, it might be best to consider replacing the panel altogether. Depending on the style and color of your existing garage door, it may be possible to find replacement panels that blend in perfectly.

Garage door repair technicians have a range of different tools and techniques that they can use to remove the old panels and install the new ones. They can also make any necessary adjustments to ensure that the door functions properly once the new panels are in place. This includes testing the sensors to ensure that they are able to detect obstacles in the way, and adjusting the hinges that connect the panels to the track system.

If you are considering repairing or replacing your garage door panels, it is always best to consult with an expert. They can provide advice on the most suitable solution and help you to achieve the look you want for your home. They can also provide helpful tips on how to take care of your garage door so that it lasts as long as possible.

When choosing a repair technician for your garage door, be sure to look for one with a good reputation and experience. You can ask for referrals from family and friends or do some online research to find out more about their past work. You can also read reviews from previous customers to see what their experiences have been like with the technician. This will help you to narrow down your options and choose the best repair technician for the job.

Misaligned Tracks

A garage door that has become misaligned can cause damage to the panels and other components of the system, causing costly repairs down the road. Visible gaps and misalignment can also allow drafts, pests, and other undesirables to enter your home, which is why it’s crucial that you address these issues promptly.

Often, misalignment is caused by physical damage to the tracks. This may occur as a result of an accident, such as being hit by a vehicle or object, or it could be due to natural deterioration over time. Either way, the track can bend or warp, which will affect the smooth operation of your garage door.

One of the most noticeable signs of track misalignment is a loud rubbing or scraping sound that occurs every time your garage door moves up or down. This occurs when the rollers are hitting a specific point on the tracks and can result in extensive wear and tear, which will require replacement of the track or even structural damage.

Visible gaps between your garage door and its frame are another clear indicator of track misalignment. This can allow cold air to enter during the winter and warm air in during the summer, increasing your energy bills. Additionally, it can allow drafts and other pests to enter your home, posing a risk to the health of your family and pets.

In general, the best way to avoid track misalignment is to perform regular maintenance and inspections. This will help to identify any potential problems and prevent them from arising in the first place.

When performing DIY maintenance, always work with the garage door down and never attempt to remove or loosen any screws without a suitable alternative handhold. It’s also important to use a lubricant to keep the tracks and hardware free from dirt and debris.

A good technique for straightening a bent track is to loosen the screws and bolts holding it in place and then apply leverage with a pair of pliers to gently bend it back into shape. This should be done with extreme caution, as applying too much pressure can cause the track to break.

Broken Rollers

The rollers on your garage door play a critical role in moving and functioning the system. These small, easily overlooked parts perform a lot of heavy lifting, and they’re prone to breaking down over time due to regular use, environmental elements, and a lack of proper maintenance. When they break, they can lead to a variety of problems with your garage door’s movement, safety, and overall performance. A few basic steps like lubricating them regularly and catching any signs of broken rollers can help you avoid costly replacement costs in the future.

Just like springs, rollers on a garage door come with an estimated number of cycles that they’ll be able to perform. However, because the average residential garage door experiences two to three usage cycles a day, they’ll be subject to plenty of wear and tear over time. If you’re not careful about keeping up with your rollers’ performance, they can break down prematurely and impact the lifespan of other components such as your garage door opener gears, sprockets, and belts.

When your rollers start to lose their integrity, it can cause the garage door to open and close slowly or in a visibly jerky manner. This adds stress to the entire system, potentially shortening its lifespan, and can be a major inconvenience for homeowners who depend on their garage doors daily. A professional garage door repair service can assess your rollers and replace them when necessary.

Identifying and replacing damaged or broken rollers isn’t difficult, but it’s still best left to the pros. Attempting to do this on your own can cause additional damage and result in an even more expensive replacement project. Before starting, be sure to disconnect the emergency release rope and unplug the garage door opener to prevent operation during the process. It’s also a good idea to have someone watch the situation for safety reasons.

Once you’ve removed the old rollers, bend one side of the track near the seam forward using locking pliers to remove them from the track. Be sure to remove any other remaining pieces of debris from the track and track before installing new rollers. Once installed, you can re-engage the emergency release and reconnect the garage door opener. Be sure to operate the door manually and electrically a few times to make sure that everything is working properly.

Kitchen Remodeling Ideas

Tacoma Kitchen Remodeling offers a chance to add new features that meet your family’s needs. Whether you’re looking for a stylish design or upgrades like recessed lighting and energy-efficient appliances, the right upgrades can improve livability and boost resale value.

Kitchen Remodeling

Start by establishing your goals and budget for the project. Remember to set aside contingency money for surprises that can’t be planned, such as removing load-bearing walls or plumbing and electrical upgrades.

Cabinets are at the heart of every kitchen. They provide the structure and storage space for everything from food to utensils. They also offer a great opportunity to define your personal style and create a room that is comfortable, efficient and easy to work in.

A new cabinetry design can also add a significant amount of value to your home and is one of the few remodeling projects that typically offers a high return on investment at resale. However, it is important not to go overboard with your cabinet and countertop selections to avoid being overwhelmed by the costs of a full-scale renovation that exceeds what your home’s market can support.

When selecting a cabinet material, consider your kitchen’s traffic patterns and functionality. Durability is an important factor when comparing cabinets to other materials, particularly in a kitchen where moisture and heat are prevalent. Wood cabinetry offers natural, traditional beauty with the added benefit of being resistant to moisture and stains. Laminate, on the other hand, can give you an almost unlimited number of color, pattern, and design options with less up-front cost.

While cabinet finishes are a personal choice, most homeowners choose a lighter color for upper cabinets and a darker finish for lower cabinetry to complement the floor and counters. White cabinets are a popular option that can instantly brighten up the room. For a more dramatic effect, dark stain or paint can also add visual depth to the room.

If you’re going to install new appliances during your kitchen remodel, plan ahead to ensure that they are delivered before you begin tearing down existing cabinets. It’s best to order appliances well in advance, especially if they are custom sizes and colors, says Hillery.

Countertops

Countertops are a kitchen’s focal point and can help tie the look of your entire space together. Whether you prefer light, dark or somewhere in between, you’ll find an array of natural and manufactured options to choose from.

Marble and granite countertops continue to be popular choices for many homeowners, thanks in part to their classic beauty and durability. However, these natural materials can be susceptible to cracking, chipping and staining. If you’re concerned about these issues, quartz may be a better option for your new countertops. Quartz countertops are durable and offer a wide variety of colors and patterns to suit your taste.

If you’re interested in a more unique look, consider river rock countertops. These beautiful surfaces consist of small, polished river rocks suspended in acrylic or cement and can be made into a variety of shapes and styles. This countertop material is also easy to maintain and withstands heat damage.

Stainless steel countertops are another stylish option for modern kitchens. They can be cleaned easily with mild soap and water and are nonporous, making them resistant to bacteria. However, this material shows fingerprints and can be scratched, so it’s not ideal for homes with children.

If you’re not able to save up for your countertop remodel, consider a home equity line of credit (HELOC). These loans use your existing home equity as collateral and typically come with low interest rates. However, you’ll need to have enough home equity to qualify and the right amount of cash on hand to cover any closing expenses. Be careful to plan a sound repayment schedule so you can pay off the debt in a timely manner.

Flooring

The kitchen is a semi-moist area where steam, spills, and high foot traffic can cause wear and tear on floors. To combat these conditions, a durable material is key. Tile, carpet, hardwood and composite laminate boards are popular choices. Each offers different style and color options, as well as pricing that can affect your overall project costs.

Kitchen cabinets are another major expense. Even with trends for open shelving and upper cabinet alternatives, cabinets still provide essential storage for food and supplies. Work with your contractor to design cabinets that meet your space and budget goals.

In many cases, you’ll need to add new plumbing or electrical lines as part of a remodel, which can increase the total cost of the project. Depending on your remodel plan and where these lines are located, you may need to change your floor plans. These alterations can be costly and require a significant amount of time to complete.

Flooring needs to be durable enough for the wear and tear of a busy kitchen, but also fit your aesthetic and design goals. Wood can create a warm, inviting look, while concrete and tiles can offer a sleek and contemporary vibe. Alternatively, you can opt for a modern look with patterned or geometric-shaped tile.

If you’re on a tight budget, your contractor may suggest working with subcontractors to perform certain parts of the remodel, such as plumbers, electricians and flooring pros. This can significantly reduce your costs by allowing you to hire the contractors of your choice and keep their overhead low. However, it’s important to understand that working with subcontractors can increase your project timeline and requires a large amount of oversight on your end.

Appliances

Your kitchen appliances play an important role in your cooking and eating experience. During your remodel, consider replacing old appliances with newer models that have better energy efficiency and smart features to make food prep and cleanup easier and more fun.

Be sure to select appliances that are compatible with your home’s style, as well as your budget. You can often save money by choosing appliance finishes and sizes that are standard, rather than custom options. If you are planning to sell your home in the future, remember that overly customized kitchen elements can limit your potential buyer pool.

Creating a comprehensive wish list and researching appliance features before you shop will ensure that your kitchen remodel results in the kitchen of your dreams. Your designer or trade professional can help you match your needs and wants to available options.

For example, if you cook a lot, your designer may recommend a double oven to accommodate larger batches of food and reduce cooking time. If you entertain, they might suggest a warming drawer or ice maker to streamline the serving process. And if you are concerned about air quality, a hood with ventilation will keep smoke and odors at bay.

It is also a good idea to plan for unexpected expenses during your remodel. Setting aside a cash reserve or getting preapproved for a line of credit will allow you to cover costs when they arise. These funds can come in handy when you are forced to replace a broken appliance or if you discover that your renovation requires more extensive work than originally planned. This will protect your bottom line and keep your project on track.

Lighting

Homeowners are looking for ways to improve the functionality of their homes. One of the most popular renovations is a kitchen remodel. A kitchen remodeling project can increase the value of a property and enhance its aesthetic appeal. It can also save homeowners money on energy bills and reduce the need for costly repairs.

During a kitchen remodeling project, homeowners are often concerned with the color scheme and the look of new cabinets, countertops, flooring, and appliances. However, they often overlook the importance of a well-designed lighting system. A poorly lit kitchen can be uninviting and difficult to work in. It can also lead to safety concerns by making it difficult to see food prep areas and other kitchen tasks.

A successful lighting design should include a combination of ambient, task, and accent lighting. This ensures that all areas of the kitchen are well-lit and allows you to adjust the ambiance depending on your activity or mood. Pendant lights are a popular option for kitchens because they can be installed in a variety of styles and finishes to match any design theme. Decorative chandeliers are another way to add a focal point that will make your kitchen stand out.

Under cabinet lighting is a great choice for kitchens because it can function as task and accent lighting. It is perfect for illuminating countertops and backsplashes, and it can be adjusted with a dimmer switch to create a warm and welcoming ambiance.

Homeowners are embracing the idea of incorporating artwork into their kitchen designs, and a well-placed lighting fixture can help to highlight these pieces. Whitehead suggests using recessed, adjustable fixtures that can be used to illuminate canvasses and framed artwork, such as photographs.

The Most Common Residential Ceiling Types

Ceilings Perth is the overhead interior surface that marks the upper limit of a room and conceals the underside of the floor or roof structure above. Ceilings are often decorated, with frescoes and artwork appearing on them, particularly in religious buildings.

To calculate the area of a ceiling, measure the length and width of the room. If the room has areas that jut in or out of the basic rectangle, multiply the products of those measurements to find the square footage.

The ceiling is often overlooked, but it plays a vital role in the overall aesthetic and functionality of your home. A wide range of residential ceiling types exist, with options for almost every room and architecture style. From sleek and modern designs like coffered and tray to traditional options such as vaulted and cathedral, these ceiling types can transform your space and elevate any interior design.

A vaulted ceiling is a classic choice for high rooms and hallways, creating a sense of grandeur that will set any interior design apart. Inspired by traditional church design, this ceiling type features symmetrical steep slopes that connect at the center of the room to create an airy space with old-world charm. The only drawback is that the sloping sides can make it difficult to access electrical points or clear cobwebs.

With a ceiling that resembles an inverted tray, this ceiling design can be moulded or recessed, with hidden strip lights casting a soft glow on the ceiling. Tray ceilings can be crafted from wood, plaster of Paris (POP), or gypsum board and are great for adding height to a room and making it feel spacious.

Another popular option for a ceiling is the coved ceiling, which consists of curved sections that form a rounded surface around the room’s perimeter. These sections are typically fixed to the walls and then covered with a smooth or textured finish. One of the more dramatic coved ceilings uses wood to create a beautiful, rustic look, although this option isn’t for everyone because it can be expensive and difficult to maintain and repair.

Conventional ceilings are simple and straightforward, but that doesn’t mean they don’t have their own unique appeal. They can be painted or textured in a variety of styles, from flat paint for a minimalistic look to orange peel or knockdown textures for a more traditional appearance. Some homeowners even opt for shiplap, which is more commonly known as wall siding, to add a contemporary and rustic touch to their homes.

If you’re going for a more industrial look, an exposed ceiling can be the perfect fit. This ceiling design leaves the wires, ducts and other services exposed to the room, giving it a raw and rustic feel that many homeowners love.

Styles

From simple to sophisticated, there is a ceiling style for every home. Although often overlooked, this design feature influences the overall aesthetic of a space. When it comes to building your dream home or renovating an existing house, the ceiling is a unique opportunity for you to show off your personal style and add visual interest. From a traditional design to a more contemporary approach, explore the nine most common ceiling styles below to determine which is the best fit for your home.

Flat and relatively cheap to install, conventional ceilings are the most popular choice for new homes. This style offers a simple look and can be easily modified through the use of molding or paint color. However, it is not as visually interesting as other ceiling options.

A coffered ceiling is a more formal option that features sunken panels throughout the room. The resulting grid-like pattern can be enhanced with decorative molding for a truly awe-inspiring design. This ceiling style is most commonly seen in libraries or dining rooms and can be a great way to tie together the architectural styles of your home.

A vaulted or domed ceiling is a dramatic design option that creates an inverted V shape in the space. They can be adorned with wooden beams that are either the load-bearing structural elements of the home or decorative ones installed over them. Whether used in living rooms or bedrooms, this ceiling can make your home feel larger and more spacious.

Another dramatic ceiling design, a barrel vaulted ceiling creates a curved, upward slope in the space. They can be adorned in wooden or metal beams and can create a warm and cozy atmosphere.

A shed ceiling is a more casual approach that slants towards one side of the room. It can be adorned with a variety of textures, such as flat or smooth for a minimalist approach and orange peel, skip trowel, and knockdown for subtle texture. Shed ceilings can work well in farmhouse-style homes or even as a design accent for weekend cottages.

A drop ceiling is a type of suspended ceiling that works well in commercial buildings, but it can also be used in residential spaces. This ceiling type “drops” from your primary ceiling and can conceal ductwork, wires, and pipes. While it is not as easy to modify as other ceiling types, a drop ceiling can be a good solution for a limited budget.

Materials

The material used to create ceilings is important because it contributes to the overall look and feel of a space. It can also serve functional purposes, such as preventing fire from spreading or hiding pipework. The ceiling is often made of gypsum board, but it can also be made from wood, vinyl or fibre-cement.

Another popular ceiling material is metal, which can add a sleek and modern design to any room. This material is also easy to clean and durable. It is available in a variety of different finishes, including galvanized steel and aluminum. These ceilings are easy to install, and they require little maintenance.

Fiber false ceilings are also made from various materials, such as recycled papers, perlite, vegetable fibers, mineral wool, tar, and asphalt. They are usually compressed and bonded using a binding agent. They are popular in commercial buildings, and they provide excellent sound insulation and heat resistance.

Gypsum boards are commonly used as ceilings because they are fire-resistant and acoustic insulators. They are available in a range of thicknesses, and they can be designed to meet specific building requirements. These ceilings can be installed with a grid or without one, and they are easy to install.

Wooden plank ceilings are another popular choice for homeowners because they provide a warm and natural ambiance. They can be painted or stained to match any décor. They are also a good choice for those who want to reduce their energy bills, as they are a natural insulator. These ceilings are also easy to maintain, but they can be more difficult to paint than other types of ceilings.

Corrugated iron ceilings are a cheap and durable option for home owners. They are easily installed on a wood skeleton and can be covered in a variety of materials. They are a good choice for people who want a rustic and nature-inspired look, but they should be treated with heat-resistant paint and insulation.

Glass ceilings are another option for those who want to add a stylish touch to their home. These ceilings are a great way to enhance natural lighting and can make a room appear larger. They are easy to clean and can be decorated with a variety of patterns and colors.

Installation

The ceiling is a space above the room that allows services such as pipework and ducting to pass through, while insulation and fireproofing can be placed in this area. This ceiling can also play a part in reducing fire hazard, so it is important to consider the type of material used and how it can be made fire resistant.

There are several ways to install a ceiling, depending on the design you want and how easy it will be to access existing services. Drop ceilings, which use cardboard panels that are suspended from aluminum struts, make it easier to repair pipes and wiring as they are less likely to crack or tear, but can be more expensive than other types of installation.

Vaulted ceilings can be created by adding wood beams — either the house’s real ones or decorative versions that are installed over them. This dramatic style can add a lot of value to your home, and it can allow for tall windows or skylights that let in lots of natural light.

If you are installing a ceiling, it’s a good idea to have the room tested for asbestos before beginning work. Also, have the joists and any wires tested for safety. This is a job best left to a professional.

Start by marking the location of the ceiling joists in the ceiling with an electronic stud finder and a pencil. You will need to do this on two opposite walls of the room. Then, locate the center of each joist by using a framing square or circular saw to cut a straight line across the ceiling surface where you have marked.

Before setting the Main Runners, place a couple of full tiles in the grid to ensure they are level with the perimeter trim already mounted. This will be easier to do once you have set the perimeter Cross Tees, which should rest on Edge Trim/Wall Angle.

Set the Main Runners at 600mm centres, or for larger tiles, 1200mm centres. When you have done this, you can attach the Edge Trim to the main runners.